 fishtank.cam
Tests · UNS 75P Community · UNS 30A Bettas
Tests.
Ammonia and nitrite every 3 days while it cycles. Nitrate, pH, GH and KH once a week, on Sun before the water change. Every test weekly once the fish are in.
pH, ammonia and nitrite every 3 days while cycling, before a water change. Weekly once the betta is in.
Ammonia
Goal 0Goal 2 while cycling- Under 1and nitrite under 1: Dr. Tim's back to 2
- 5 or more30% water change today, no Dr. Tim's
- Under 1and nitrite under 1: Dr. Tim's back to 2
- 5 or more25–30% water change today
Nitrite
Goal 0- Anygood, the cycle is moving
- 530% water change today, no Dr. Tim's
- Climbs, dark purplenormal mid-cycle
- Drops to 0nearly done (card 4)
Nitrate
Under 40- Risingas 1 and 2 fall: nearly there
- Over 40Sunday's change brings it down
- Risingthe cycle is working
- Over 40the big change at the end clears it
pH
- 6.0means 6.0 or lower · log it, nothing to fix
- ✕Neverbaking soda or buffer in this tank
- Under 725–30% water change today
- 7 or moregood for the cycle
Water change · UNS 75P Community · UNS 30A Bettas
Water change.
30% every Sunday.
While cycling, only when pH reads under 7. Weekly with the betta.
In this order
- Test firstCO2 off
- Heater off
- 2 min
- Filter offBack on within the hour
- Drain 30%Sicce or Python · tube above the carpet
- Keep the moss tree wetSpray it, or a wet paper towel
- Prime 4 mL4 cap threads
- Equilibrium about 12 gStirred into 1 L of the new water first
- Refill with the PythonWithin 1–2 °F · aim at the glass
- Filter onGurgling: press the priming button
- 1 min
- Heater on
- 10 min
- Check the temperatureToward 74 °F · heater plug shows watts
- Stability 8 mLThen test ammonia, Dr. Tim's by the formula, log it
In this order
- Test first
- Heater off
- 2 min
- Pump off
- Siphon outThe small siphon
- Prime 1 mLInto the tank
- Refill slowlyOnto the wood · within 1–2 °F
- Pump on
- 1 min
- Heater on
- 10 min
- Check the temperatureToward 78 °F
- Stability 1.25 mLThen log the change
Dosing · UNS 75P Community · UNS 30A Bettas
Dosing.
About 33 gallons of water.
About 6 gallons of water.
The rest
Dr. Tim's ammonia, to 2 ppm
R = the reading · 66 drops = 1 ppm · again only when ammonia and nitrite are both under 1 · stop at 5
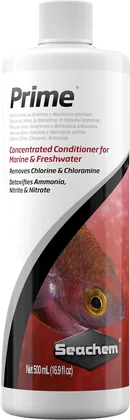
Prime
Water change · into the tank before the refill
Prime
Fish in, ammonia or nitrite over 2 · again in 24 h if still high
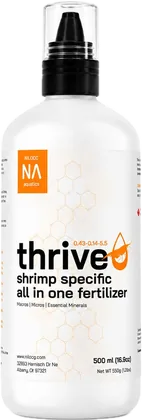
Thrive S
Mon and Fri · label: 1 pump per 5 gal
Equilibrium
Sunday's new water, stirred into 1 L · toward GH 6 for the shrimp · not in top-ups · Seachem: 16 g per 80 L raises GH 3
To start the cycle
- 0.5 mLPrimeOnly if the water was not dechlorinated · 5 mL per 200 L
- 20 dropsDr. Tim's ammonia4 per gallon = 2 ppm · about 5 gal of water
- 2.5 mLStabilityNear the intake slots · 5 mL per 40 L on day 1
After that
Ammonia, back to 2
Only when ammonia and nitrite both read under 1
Prime
Water change
Stability
After a water change · 5 mL per 80 L
Flourish Tabs
Under each crypt group, bottom of the sand · new each 3 months
Thrive S, at most
Once the plants are growing
Equilibrium
Only if snails or shrimp go in · in the new water · not for the betta alone
Cycle · UNS 75P Community · UNS 30A Bettas
Is the cycle done?
The test
- 132 dropsAfter the light goes offDr. Tim's ammonia, to 2 ppm
- 24 hTest ammonia and nitrite0 + 0: cycled · else keep going
- 30%Water change
- ≤ 2 daysFirst small batchCard 6
- 1 weekTest dailyAfter each batch
Then the betta
- 70%Water changePrime 1 mL
- ~12 dropsAmmonia dailyUntil he comes home
- ≤ 2 daysBring him homeCard 5
- WeeklyWater changesCard 2
CO2 · UNS 75P Community
CO2.
Lime green in the drop checker.
Read it at full light
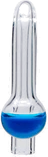
Blue
Too littleUp ½ bubble/s · once a day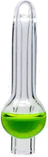
Lime green
RightLeave it a week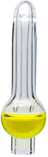
Yellow
Too muchTurn it down nowChecks
Bubbles a second
To start
Working pressure
Inline diffuser: 30–45
Bottle gauge
Drop checker fluid: new each 2–4 weeks
Close the bottle valve
Let the bubbles run out, then unplug
Fish · UNS 75P Community
Adding fish.
Small batches, two weeks apart. Hardy first, timid later.
- −3 wkSeed the spongeIn the canister
- 3–4 wkQuarantine10 gal · watched daily
- 15–20 minFloat the closed bag
- 30–45 minTank water in, each 5 minShrimp: drip 1 h
- NetNo store waterLights low the rest of the day
Quarantine tank
Watch for
Feeding
Fish
A pinch, gone in a minute · leftovers out
One fast day a week
Bottom crew
A sinking wafer after lights out
Fish · UNS 30A Bettas
The betta.
One male. Shrimp and snails are fine.
- 15–20 minFloat the closed cup
- 30–45 minTank water in, each 5 min
- NetNo store waterLights low the rest of the day
Feeding
Pellets
Once or twice a day
Frozen
Brine shrimp or daphnia
Fast day
Leftovers out after a few minutes
Away a weekend
No holiday feeders
How he is doing
Well
Trouble
Each fish · UNS 75P Community · UNS 30A Bettas
Who lives here.
Who lives here.
Six kinds of fish. What each one needs.
One betta and a small clean-up crew. The crew goes in first.
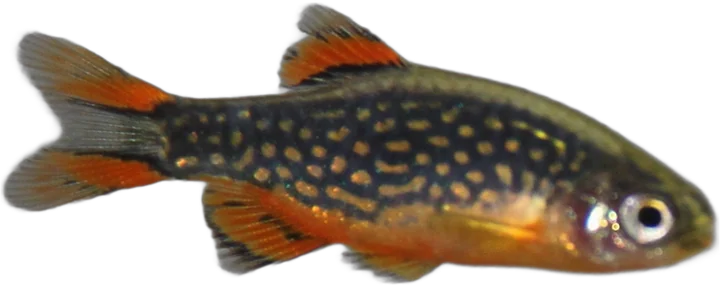
Celestial pearl danio
Danio margaritatus
The favourite · first in- EatsSmall dried food that sinks, plus daily small live or frozen food: daphnia, brine shrimp. Rarely comes to the surface.
- LikesHeavy planting, a dark floor, floating plants, gentle flow.
- KnowTimid. Easily pushed off food by bigger, busier fish. Needs a steady pH.
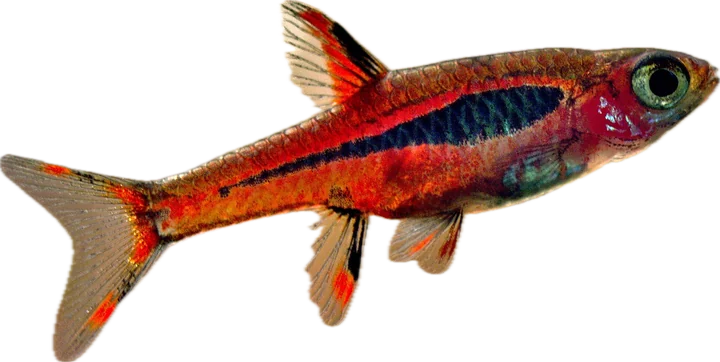
Chili rasbora
Boraras brigittae
The red school- EatsTiny food: good flakes or granules, plus daily small live or frozen food: daphnia, brine shrimp. Not dry food alone.
- LikesDense plants, floating cover, gentle flow, soft water (1–10 dGH).
- KnowTimid. A big group calms them and brings out the males' colour.
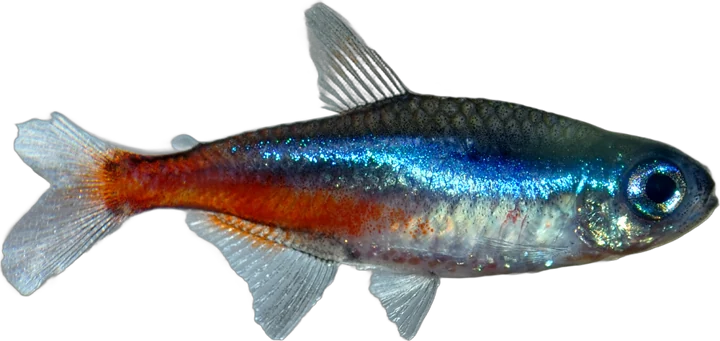
Neon tetra
Paracheirodon innesi
The second school- EatsFlakes or micro pellets, plus frozen bloodworm or daphnia.
- LikesDim light, floating plants, wood.
- KnowPeaceful. Calmer in a mixed group of males and females, with other schools around.
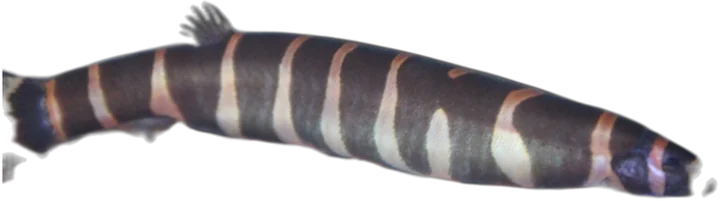
Kuhli loach
Pangio semicincta
Bottom dwellers- EatsSinking food after lights out, plus frozen bloodworm or brine shrimp.
- LikesA soft floor to dig in, shade, gentle flow.
- KnowRests piled together in one nook. Can jump, most of all when new.
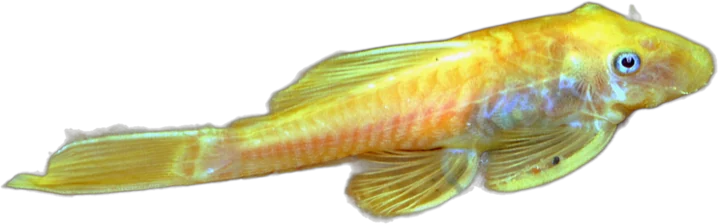
Bristlenose pleco
Ancistrus sp. · L144
Algae grazer- EatsSinking wafers, frozen bloodworm or daphnia, and vegetables: boiled potato, fruit, spirulina.
- LikesWood and caves to hide in, well-oxygenated water.
- KnowPeaceful with other fish. Chases its own kind.
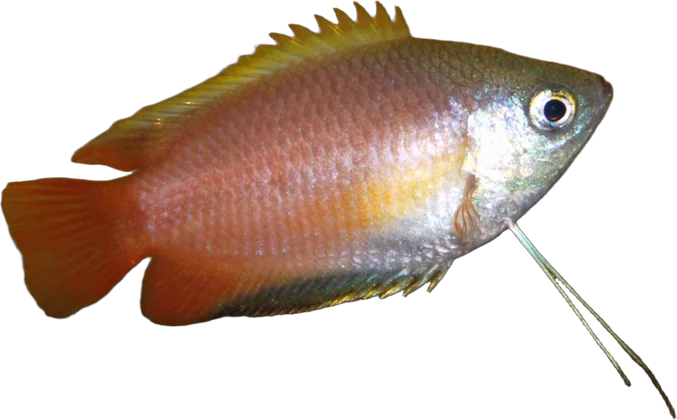
Honey gourami
Trichogaster chuna
The showcase fish- EatsFlakes, plus frozen daphnia, brine shrimp or bloodworm. Slow: make sure food reaches him.
- LikesFloating plants, shade, calm water.
- KnowBreathes air at the surface. Shy around busy tankmates.
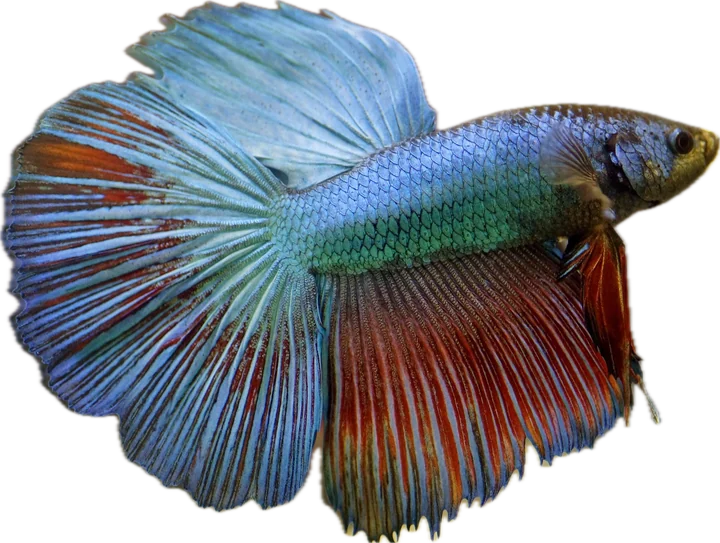
Halfmoon betta
Betta splendens
The only fish- EatsPellets, plus frozen daphnia, brine shrimp or bloodworm. Small meals: bettas get fat easily.
- LikesStill water, shade, floating plants, crypts, moss on wood.
- KnowBreathes air: lid on, a gap of air under it.
- NeverA second betta, or fish with long trailing fins.
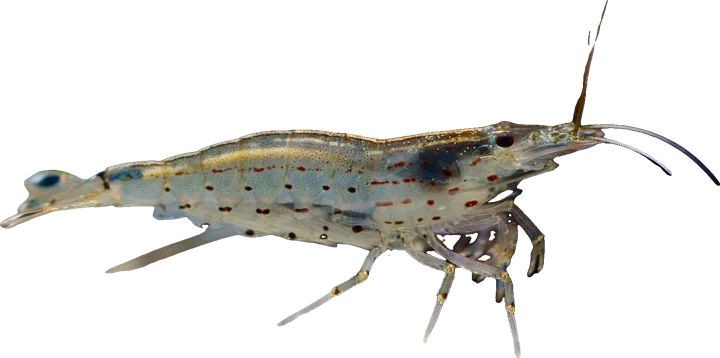
Amano shrimp
Caridina multidentata
Clean-up crew- EatsAlgae and leftovers. Now and then a shrimp food with calcium, an algae wafer or blanched vegetables.
- LikesPlants and moss to pick through, stable water, some minerals for moulting.
- KnowClimbs out through gaps: lid on. Does not breed in fresh water. An empty shell is a moult.
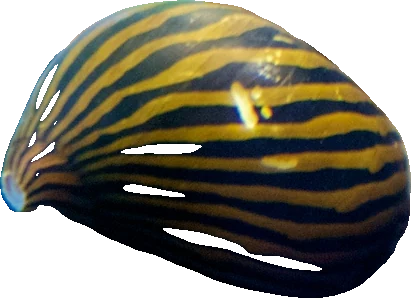
Nerite snail
Neritina
Clean-up crew- EatsAlgae on glass, wood and leaves. When it runs low: algae wafers or blanched zucchini.
- LikesHarder water with minerals. Soft water wears the shell.
- KnowClimbs above the waterline: lid on. Lays white eggs that do not hatch in fresh water.
- NeverMedicine with copper.
Emergencies · UNS 75P Community · UNS 30A Bettas
When something goes wrong.
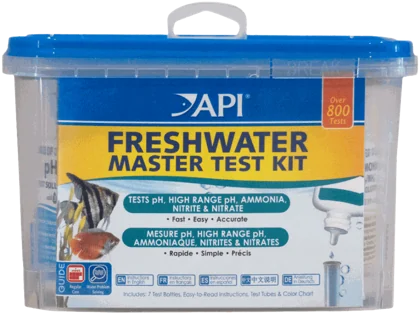
In the stand, ready:

part 33803

Gasping at the top
- Unplug the CO2
- Lift the outflow: ripple the surface
- Half water change today
- CO2 back on lower, once green
Ammonia or nitrite, fish in
- No food
- Half change today, again tomorrow if up
- Over 2: Prime 20 mL too
- No new fish until both read 0
Power out
- Towel over the top and sides · no food
- The CO2 stops by itself
- Past 4 h: filter unplugged, baskets into a half bucket of tank water
Power back
- Under 4 h: filter runs, heater on after 1 min
- Longer: empty the canister, baskets back, refill with tank water, plug in
- Test today and 3 more days · food after a day
Water under 72 °F
- Heater plug? Filter running?
- Still cold: heater and filter off, spare HeatUp in, set 74 °F
- Let it warm by itself · no hot water
- Watch for white spots 2 weeks
Filter stopped
- Heater off first
- Plug · unplug 1 min · priming button
- Still stopped: rinse the impeller in tank water
- Off over 4 h: restart as after a power cut
Water on the floor
- Heater off, then filter off
- Check the hose ends and the inline diffuser
Hissing in the stand
- Close the CO2 bottle valve
- Soapy water on the joints: growing bubbles show the leak
A sick fish
- Test all four and the temperature
- To the quarantine tank, in a cup of its own water
Ammonia or nitrite, betta in
- No food
- Half water change today
- Over 2: Prime 5 mL too
Heater stopped
- Water level: it shuts off when low · top up
- Check the plug
- Let it warm by itself · no hot water
Pump stopped
- Plug and power adapter
- Clear the intake slots
Power out
- Towel over the top · no food
- Still water is fine: he breathes air
Looks unwell
- Test all four and the temperature, before anything else
Setup
How it goes together.
CO2 · UNS 75P Community
CO2.
Running since October 17. Bottle, regulator, check valve, diffuser.
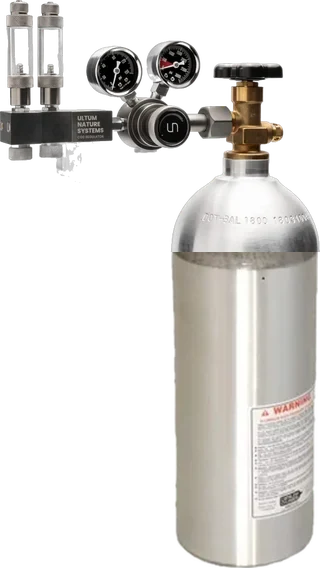

Working, in tank
Inline 30–45
First bubble rate
Then up slowly
Full bottle
800–1000
Checker fluid
Or when it fades
In the boxes
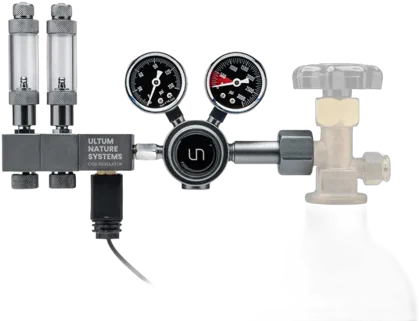
UNS Pro Dual Stage regulator
Solenoid, needle valve, bubble counter
Power plug
12 V, for the solenoid
Allen key + spare O-rings
In the regulator box
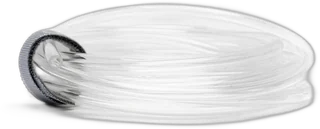
UNS Pro CO2 tubing
Two packs
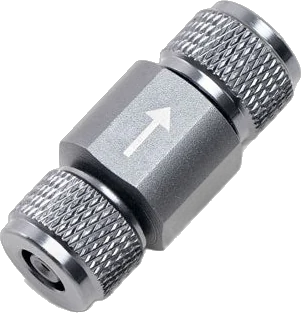
UNS Pro check valve × 2
One per diffuser line
Aquario Neo CO2 Curved Original, Large
Two suction cups
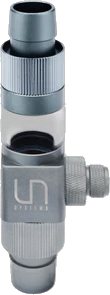
UNS Pro Inline diffuser, 16 mm
Plus two spare discs
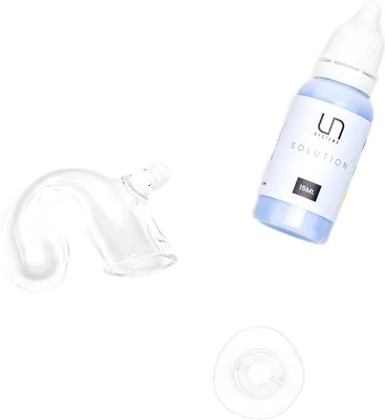
UNS Drop Checker, SD
Glass, fluid, suction cup
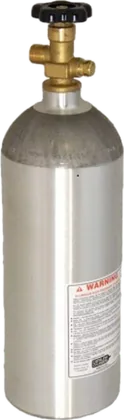
5 lb CO2 bottle
Filled at Jorgensen
The regulator
- 1Pressure knobCounter-clockwise to “–” is off. Clockwise raises the working pressure.
- 2Needle valveClockwise to “OFF”. Counter-clockwise for more bubbles.
- 3Bubble counterFilled with water from the top. Check valve built in.
- 4SolenoidGas flows only while it has power.
- 5Two gaugesUp to 4000: the bottle. Up to 160: working pressure.
- 6Bottle nutCGA-320. Tighten with a wrench, 15–20 ft-lb.
- 7Bottle valveOpen all the way, or closed.
First start
Put it together
- Look it over. Threads clean, no dust, oil or grease.Wipe with a dry cloth. Damaged: stop.
- Both knobs down. Pressure knob counter-clockwise to “–”. Needle valve clockwise to “OFF”.
- Fill the bubble counter with water from the top. Screw it tight.
- Regulator onto the bottle. Tighten the nut with a wrench, 15–20 ft-lb. No oil or grease.
- Tubing from the bubble counter to the check valve, arrow toward the tank, then on to the diffuser.Cut the tubing and push it onto each end. Valve upright.
- Power: solenoid cable to the 12 V plug, plug into the CO2 smart plug.
Turn it on
- CO2 plug on in Home Assistant.
- Stand beside the bottle, not in front of the gauges. Open the bottle valve slowly, all the way.Bottle gauge: 800–1000 psi
- Pressure knob clockwise to the working pressure.In tank 25 psi · inline 30–45 psi
- Needle valve counter-clockwise, slowly, until bubbles show.Start at 1 bubble a second
- Leak test (below) before you walk away.
- Wait an hour, then read the drop checker.
Leak test
- Close the bottle valve. Pressure knob down.
- Watch the bottle gauge. It holds: sealed. It drops: a leak.
- Brush soapy water on the bottle nut and joints. Bubbles show the leak. Tighten it.
- Still leaking? Close the bottle, take the regulator off, call Buce.
The first week
- 1 bubble a second to start.
- Read the checker at full light, not when the CO2 comes on. It lags 1–2 hours.
- Blue? Up half a bubble a second. One step a day.
- Green at full light: stop. Leave it a week.
- Day the fish go in: one step down. Watch them in the last CO2 hour.
Drop checker
Fill and place
- Fill the glass with the indicator fluid.
- In the tank on its suction cup.
- Read it after an hour or more.
- New fluid each 4–6 weeks, or when it fades: pour out, refill.
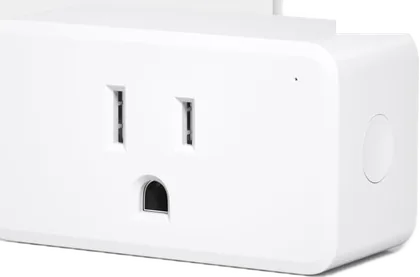 On and off
- Solenoid on a Zigbee plug. Home Assistant switches it.
- On 1 h before full light, off 1 h before lights out.
- Sun–Thu: on 1:30 pm, off 9:00 pm.
- Fri–Sat: on 3:30 pm, off 11:00 pm.
- Off during Movie mode.
- Checked each 5 minutes. Stays off after a power cut.
- Never overnight.
- Water change before CO2 on, or after it’s off.
Diffusers
In tank
- New: soak it in clean water 30 min before connecting.
- Hook over the rim. Two suction cups hold it.
- Check valve outside the tank, just before the tube goes over the glass.
- Body fills with water: it counts bubbles too.
Inline
- Cut into the filter’s outflow hose in the stand. 16/22 mm.
- Check valve a few inches from its CO2 port. It stays there for good.
- Working pressure 30–45 psi. Less and it won’t push.
- Disc in the side chamber. An Allen key opens it.
Switch diffusers
- CO2 off. Plug off in Home Assistant.
- Pull the tubing off on the regulator side of the check valve.
- The check valve stays with its diffuser. One valve per line.
- Push the tubing onto the other line. Set the pressure for it.
Clean
- Neo, bubbles getting big: 10 min in household bleach.
- Rinse well in fresh water, then water conditioner. Back in.
- Inline, bubbles getting big: Allen key, open the side chamber, swap in a spare disc.
How often
Bubbles and checker
Steady bubbles. Green at full light.
Bottle gauge
Steady: fine. Falling: refill soon.
Bubble counter water
Top it up from the top.
Drop checker fluid
Or sooner when it fades.
Clean the diffuser
Neo: bleach. Inline: new disc.
Refill the bottle
Jorgensen, 5 lb.
Bottle retest
Date stamped on the shoulder.
Leak test
Also after a bottle swap.
The bottle
Swap or refill
- Close the bottle valve. Let the bubbles run out.
- Pressure knob down to “–”.
- Take the regulator off with the wrench.
- Refill at Jorgensen (5 lb). Never fill it yourself.
- Put it back: “Put it together” and “Turn it on”, then the leak test.
Always
- Upright, wedged so it can’t tip.
- Away from heaters and heat.
- Empty weight is stamped on the bottle. Weigh it to see what’s left.
- CO2 only in this regulator.
- Never oil or grease. Never take the regulator apart.
If something’s off
No bubbles
- CO2 plug on in Home Assistant?
- Bottle valve open all the way?
- Working gauge at 25? If not, pressure knob clockwise.
- Needle valve open a little?
- Bottle gauge near zero: refill.
Bubbles stop at night
- Right. Home Assistant cut the plug.
- Bubbles at night: the plug is on. Turn it off and check the schedule.
Checker stays blue
- Read it at full light, an hour or more after CO2 on.
- Fluid older than 6 weeks: new fluid.
- Big bubbles at the diffuser: clean it.
- Then up half a bubble a second, one step a day.
Yellow, or fish at the top
- Too much CO2. Needle valve down now.
- Fish gasping: CO2 plug off.
- Keep a light ripple on the surface.
Rate creeps after start
- The solenoid warms and the needle valve drifts.
- Set the rate after it’s run an hour.
Solenoid warm
- Warm while on is normal.
- Too hot to hold, or a loud buzz: Buce support for a new solenoid.
Regulator leaks
- Bottle gauge drops with the bottle closed, or a hiss.
- Close the bottle valve.
- Soapy water to find it. Wrench the nut tighter.
- Still leaks: regulator off, call Buce. Don’t open it up.
Bottle gauge falling
- It sits near 800 while there’s liquid inside.
- Falling: the end is close. Refill now.
Big bubbles
- New Neo: soak it 30 min first.
- Older Neo: 10 min bleach, rinse, conditioner.
- Inline: pressure 30–45. Still big: new disc.
Water in the tubing
- Check valve arrow points to the tank?
- Valve upright, tubing pushed fully on.
Filter · UNS 75P Community
The canister.
OASE BioMaster 2 Thermo 250, in the stand.
Flow
Media
Hoses
Heater
How the water goes
- 1HeadPump, suction button, the lever and the IN and OUT ports.
- 2Pre-filterCarbon foams in a tube. Water goes here first.
- 3Bottom: Hel-XIn its bag. Water then rises up through the baskets.
- 4Middle: blue foam × 220 ppi.
- 5Top: orange foam30 ppi, under the filter cover.
- 6HeatUp 150In its holding ring, through the head.
- 7HandleUp to free the heater and the head.
In the box
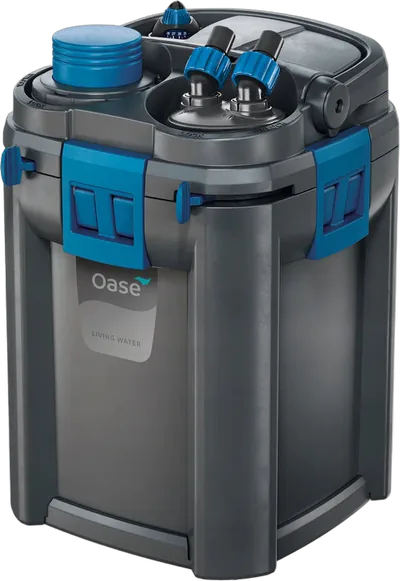
Container + head
Pump in the head
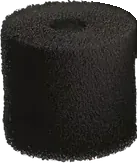
Pre-filter
Tube of carbon foams

HeatUp 150
With its holding ring
Connection unit
The lever, IN and OUT
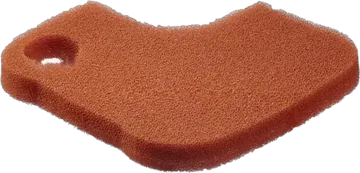
Foams 30 + 20 ppi
Orange and blue
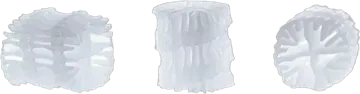
Hel-X
Always in its bag
Rubber feet
Twist into the base
First start
Set up
- Twist the rubber feet into the base.
- Rinse new media in warm tap water.
- Heater in: wet the glass, push it into the holding ring, screw the ring in clockwise. Cable in its guide, handle down.
- Filter under the tank. Lily pipes in, hoses to IN and OUT.
- Lever to LOCK.
Start
- Pump off. Press and release the suction button until water runs into the filter.Full when water comes out of the outflow
- Plug in, cords in a drip loop. The pump starts at once.
- A little noise from trapped air. It clears shortly.
- Heater set to 74 °F. Wait about 30 min, then switch it on.Only once the filter is full and water is moving
- Next day: check the temperature on the probe.
What normal looks like
Water change order
Off
- Heater off first (tank heater plug).
- Wait 2 minutes, pump running, so the rod cools in moving water.
- Filter off. Back on within the hour.
On
- Filter on once the water covers the outflow pipe.
- Gurgles or weak? Press the suction button a few times.
- Watch the outflow 1 minute, then heater on.
- 10 minutes later in Home Assistant: heater watts, temperature steady or rising.
How often
Pre-filter foams
Rinse in old tank water.
Lily pipes
Brush inside. See Lily pipes.
Baskets
Rinse in old tank water. Foams at different times.
Impeller
Out, rinse, back in.
Head seal
Clean. Damaged: new one.
Heater glass
Clear water, soft sponge.
Take apart and clean
Open it
- Tank Dial button 4: cleaning mode. Filter and heater off.
- Let the heater cool before it leaves the water.
- Lever to UNLOCK. IN and OUT close.
- Pull out the pre-filter.
- Heater out: handle up, unscrew the ring with the heater counter-clockwise.
- Head off: undo the fasteners, lift the head.
Clean
- Pre-filter: turn the casing until the hooks let go, pull it off. Rinse the foams.
- Baskets out. Rinse the media and the container.Never all the foams at once
- Impeller: pull off the venting element, pump lid counter-clockwise, impeller out, rinse.
- Impeller back, both rubber bearings seated, lid clockwise.
- Water and a soft brush only. No cleaners.
Close it
- Baskets in the bottom recess. Filter cover on the top foam.
- Head seal clean and in place.
- Head on, pre-filter opening over the basket recess. Fasteners shut, handle down.
- Pre-filter in firmly, lever to the padlock: LOCK.
- Heater back in, ring clockwise.
- Prime, filter on, heater on last (button 4 again).
Heater runs off
- Check after a day against the probe.
- Low? Check the flow first.
- Still off: hold the blue dial, turn the small black knob with the tool or a screwdriver.
- Too warm: toward minus. Too cool: toward plus.3 clicks each way, about 2 °F each
Parts that wear
Impeller unit
Flow still low after a clean
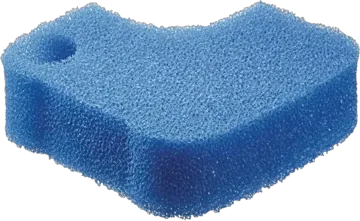
Foams
Worn or falling apart
Head seal
Damaged
HeatUp 150
No heat with power on. Exact part only.
If something’s off
Won’t prime
- Lever at LOCK?
- Filter sits below the water line?
- Rock it gently side to side to free the air.
- Still not: clean the pre-filter foams, then its valve box.
Noisy
- Just started: air. It clears shortly.
- Still noisy: rock it side to side.
Flow dropped
- Lever all the way to LOCK?
- Rinse the pre-filter foams.
- Clean the lily pipes and hoses.
- Clean the impeller. Worn: replace it.
- Then the basket media.
Leaks
- Button 4 first.
- At the head: seal clean and seated, fasteners shut. Damaged: new seal.
- At a hose: refit it on its port.
Won’t start
- Filter plug on? Cleaning mode left on?
- Impeller blocked: clean it.
Water too cool
- Heater plug on and showing watts?
- Dial on 74 °F? Flow weak?
- Then calibrate. No heat at all: new HeatUp 150.
Home Assistant notes
- Filter under 3 W: it stopped. Prime it.
- Heater over 100 W for hours, warm water: heater plug off, calibrate.
- Cool water, heater plug on, no watts: heater not working.
- Plug unavailable: check its power and Zigbee.
Lily pipes · UNS 75P Community
Lily pipes.
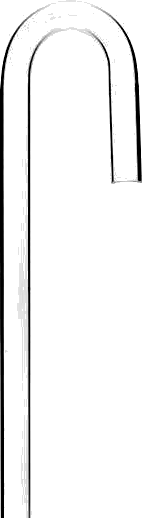
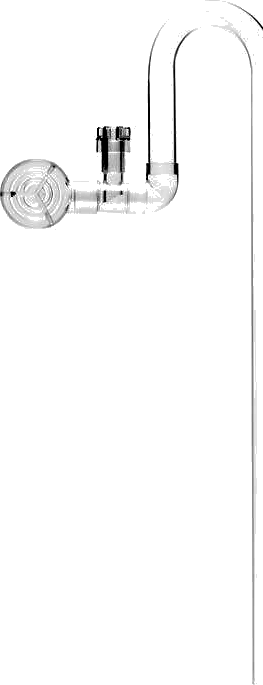
Aquario Neo Flow Premium, Large 17 mm.
On the glass
- 1InflowSlotted end low in the tank. Water goes to the filter.
- 2OutflowJust under the surface. The nozzle turns all the way round.
- 3SkimmerOn the outflow, its top at the surface.
- 4Neo HoldersTwo, on the rim. Glass up to 12 mm.
- 5Hoses 16/22 mmInflow to filter IN, outflow to OUT.
In the box
Inflow pipe
PETG, with intake grate
Outflow pipe
PETG, with nozzle
Neo Holder × 2
Hold the pipes on the rim
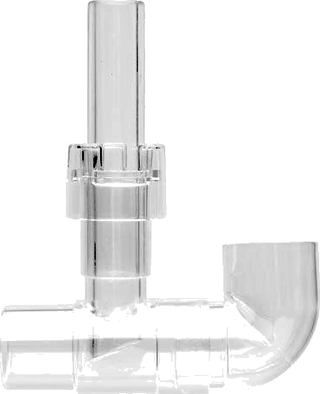
Neo Skimmer
Plus the Invincible body and two nets
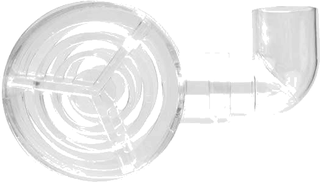
Neo Reliever
Softens the outflow
Pipe cutter
His, for trimming
Fit
Pipes
- Two holders on the glass, pipes in them.
- Hoses 16/22 mm: inflow to filter IN, outflow to OUT.
- Too long? Measure, cut the straight part with the pipe cutter or a fine saw.
- Sand the edge smooth. Put the intake grate back on.
- Turn the nozzle to aim the flow.
Skimmer
- On the outflow. Push the upright part in deep.
- Turn it left or right, up or down, to set how much surface film it takes.
- Set high for more surface movement.
- The cut face never points against the water exit.
- Water level 1–2 in from the skimmer’s top.
- Nets on the intake to keep shrimp and small fish out.
Reliever
- Wings and depth set the flow. One wing, one direction.
- Rotate it to aim the flow.
What normal looks like
- A light ripple across the surface.
- No film on the water.
- Quiet: no slurping.
- Clear pipes.
How often
Brush the pipes
Spring pipe brush, inside.
Top up the water
Keeps the skimmer working.
Citric acid soak
Grate, nozzle, skimmer.
Intake grate
Pull it off, rinse.
Clean
- Filter off: Tank Dial button 4.
- Lift the pipes out of their holders.
- Pull off the intake grate and the outflow nozzle.
- Brush the inside with a flexible spring pipe brush.
- Small parts: soak in a mild citric acid bath. Rinse well.
- Back together, back in the holders. Button 4 again.
Careful
- PETG: tough, but no force.
- A brush or citric acid won’t scratch it.
- It may cloud a little with age.
If something’s off
Film on the surface
- Water level 1–2 in from the skimmer’s top?
- Turn the skimmer to take more film.
- Nets slow it: take one off for stronger skimming.
Gurgling, slurping
- Water too low: the skimmer pulls air. Top up.
- Water always low here? Shorten the long side of the pipe.
Flow too strong
- Reliever on. Turn its wings and depth.
- Turn the nozzle toward the glass.
- Keep a light ripple: it’s the fish’s air with CO2.
Algae inside
- Brush with the spring brush.
- Small parts: citric acid soak.
Flow weak
- Intake grate clogged: rinse it.
- Then the filter card: pre-filter, impeller.
Pipe slipping
- Seat it in its Neo Holder on the rim.
Light · UNS 75P Community
The light.
Chihiros WRGB II Pro 60.
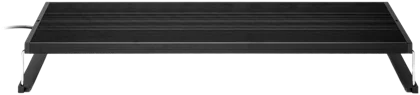
In the box
Light body
With its controller
Power adapter + plug
36 V out
Light stand
The legs, slide to width
Screws + hex key
For the stand
Fit
- Hung from the stand. The Chihiros light stand clamps on the back glass; the hanging kit’s cables hold the light level.
- At least 60 mm above the water.
- Adapter out of the splash, never on a lid.
- Cord in a drip loop. Plug in.
- Home Assistant picks it up by Bluetooth through the Atom.
Who runs it
- Home Assistant: the day, dim to full to off, the shows.
- The Tank Dial for moods.
- Never Auto mode. No timer stored in the light.
- Not from the phone app.
A normal day
Dim from 11 am
Full 2–10 pm.
Dim from noon
Full 4 pm–midnight.
30 min sunrise, sunset
Inside the full window.
Moonlight
20 min of soft blue.
Care
- Unplug before cleaning.
- Hot while on. Let it cool first.
- Keep water drops off the panel.
- Never cover the light or the adapter.
- Never look straight into it.
Into the water
- Unplug it at once.
- Dry it out fully before it goes back on.
- Damaged cord or adapter: original Chihiros parts only.
If something’s off
Home Assistant lost it
- Wait a few minutes. It retries each minute and resends the plan each 5.
- Atom by the tank, on its USB charger?
- Light’s adapter plugged in?
Colours look wrong
- A mood, Storm or dial look still on?
- “Back to schedule” on the Chihiros page.
Auto mode came on
- Home Assistant notes who did it and puts it back on its schedule.
Legs don’t sit right
- Slide them to the tank’s width.
- Screws snug with the hex key.
Water change · UNS 75P Community
Water change kit.
Pump out to a bucket, fill from the faucet.
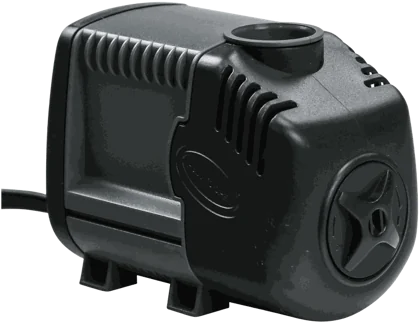
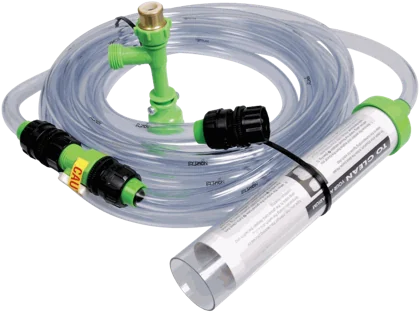
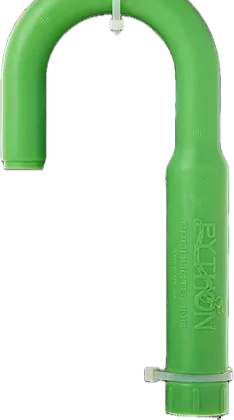
Pump out
- Suction cups into the holes under the pump.
- Hose on the threaded outlet, other end in the bucket.
- Pump in the water, then plug in. Cord in a drip loop.
- Front dial – to +: less or more flow.
- Unplug before it comes out of the water.
Fill
- Faucet aerator off. Brass adapter on.Outside threads: take the big white washer out
- Faucet pump fully onto the adapter.
- Hook on the rim, hose end in it.
- Pump set to fill. Then turn the water on.
- Match the tank within 1–2 °F.
Pump cleaning
- Unplug. Pre-filter off, ring nut off, front chamber off.
- Rotor out, rinse in fresh water. Soft brush.
- Check the O-rings. Any damage: replace.
- Back together in reverse.
Order of a change
- Heater off, wait 2 min, filter off.See the filter card
- Pump out with the Sicce or the Python.
- Prime into the tank, dosed for the whole tank.
- Fill within 1–2 °F of the tank.
- Filter on, then heater.
If something’s off
Python won’t drain
- Cold water on full. Pump on “drain”.
- Fittings tight. Pump top fully on the adapter.
- Top wobbles? Hold the pump, turn the hose counter-clockwise until tight.
Adapter won’t fit the faucet
- Outside threads: take the big white washer out.
- Still no: a Python MABA, or FEBA for small newer threads.
Sicce flow weak
- Dial toward +.
- Clean the pre-filter and rotor (above).
Taking the Sicce out
- Unplug first, then lift it out.
- O-rings damaged: replace before use.
Probe · UNS 75P Community
Temperature probe.
A SONOFF Zigbee probe, straight to Home Assistant.
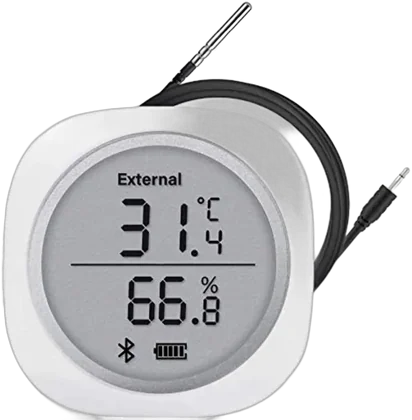
75P probe
Tip at the filter hose, in the stand
Where
- Probe at the filter or its hose, in the stand.
- Never in the display tank, never over the rim.
- Runs on a battery. Nothing to plug in.
What it does
- A note if the water leaves 72–80 °F for 20 min.
- A note if the probe goes quiet for 2 h.
Plugs · UNS 75P Community
Smart plugs.
What each one runs.
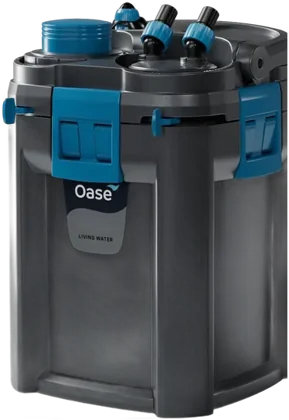
Filter
Watched for power. Off only in cleaning mode.
Heater
Watched for power. Off with the filter.
CO2 solenoid
Sun–Thu 1:30–9 pm, Fri–Sat 3:30–11 pm, with the light. Never overnight.
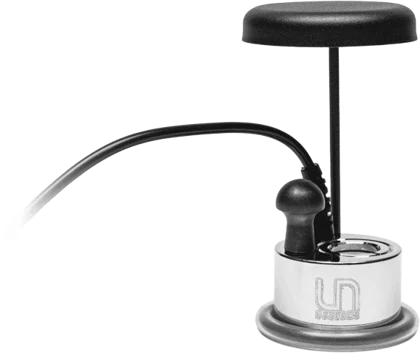
Atomizer
Mist over the water, from the dial.
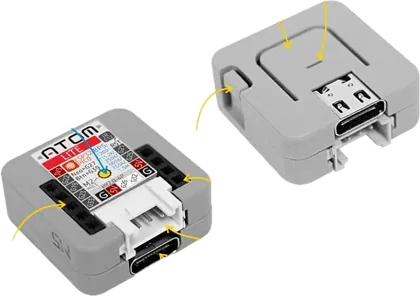
Atom
Plain USB charger.
Light
Bluetooth from Home Assistant.
UNS 30A Plakat · UNS 30A Halfmoon
The 30As.
UNS 30A Dual AIO, the same tank twice. Filter built into the back.
Cube
Water
1.9 in the back
Back chambers
Sigma 10 pump
12 V
The back
- 1Chamber 1: spongeBlack coarse sponge. Catches the dirt first.
- 2Chamber 2: Bio BlocksTwo blocks on the Bio Riser.
- 3Chamber 3: Sigma 10Pump with its hose up to the nozzle.
- 4Water level baffleLower it to skim the surface clean.
In the box
30A tank
30 cm cube, 5 mm glass
Filter sponge
Chamber 1
Bio Blocks + Bio Riser
Chamber 2
Sigma pump
Flow dial, 3/8 and 1/2 in fittings
Standard nozzle
Turns to aim the flow
Pump power supply
Low voltage
Intake guard
On the slots
Set up
- Leveling mat under the tank.
- Sponge in chamber 1, riser and Bio Blocks in 2, pump in 3.
- Pump hose on the barb, up to the nozzle.
- Fill the tank with the pump unplugged.
- Plug in once chamber 3 is full. Cord in a drip loop.
- Flow dial to suit. Turn the nozzle to aim it.
- Intake guard on the slots.
- Back lid on the chambers.
What normal looks like
- Water spills over into chamber 1 at the slots.
- Pump always under water.
- Steady flow from the nozzle.
- Clear surface, no film.
How often
Rinse the sponge
In old tank water. Stops clogs and spills.
Bio Blocks
A light rinse only.
Clean the pump
Impeller, shaft, motor.
Top up
Keep the pump under water.
Clean the pump
- Unplug it.
- Lift it out, pull off the outflow hose.
- Pull off the front faceplate. The impeller comes out.
- Rinse the impeller, its shaft and the motor in clean water.
- Back together, hose on, into chamber 3.
- Water over it, then plug in.
Clean the sponge
- Unplug the pump.
- Lift the sponge out of chamber 1.
- Squeeze it in a cup of old tank water.
- Back in. Plug the pump in.
If something’s off
Flow weak
- Flow dial turned down?
- Sponge clogged: rinse it.
- Impeller dirty: clean the pump.
Water over the top
- Unplug the pump.
- A clogged sponge backs water up. Rinse it.
Pump sucking air
- Chamber 3 low: top up the tank.
- Never let it run dry.
Film on the surface
- Lower the water level baffle in chamber 1.
Flow too strong for a betta
- Turn the pump dial down.
- Aim the nozzle at the glass.
Pump dead
- Power supply plugged in?
- Clean the impeller.
- Still dead: a new Sigma 10, 3/8 or 1/2 in barb.


